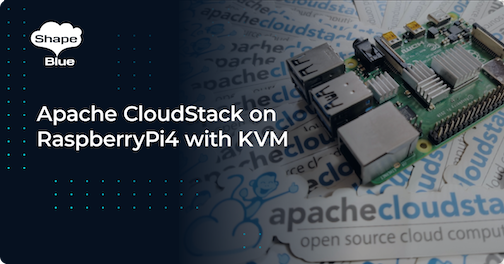
IoTs have gained interest over recent times. In this article, Rohit Yadav, Principal Engineer at ShapeBlue, explores and shares his personal experience of setting up an Apache CloudStack based IaaS cloud on Raspberry Pi4, a popular single-board ARM64 IoT computer that can run GNU/Linux kernel with KVM. The article presents the use case of Apache CloudStack on RaspberryPi4 with Ubuntu 20.04 and KVM.
CloudStack support for ARM64/RaspberryPi4 is available from version 4.13.1.0+. This guide uses a custom CloudStack 4.16 repository that was created and tested specifically against the new RaspberryPi4 and Ubuntu 20.04 arm64 to set up an IaaS cloud computing platform.
Getting Started
By default, KVM is not enabled in the arm64 pre-built images. I found this during my research where I built Linux kernel with KVM enabled on the ARM64 RPi4 board and shared my findings with the Ubuntu kernel team and influence the build team to have KVM enabled by default. With the changes, now Ubuntu 19.10+ ARM64 builds have KVM enabled.
To get started you need the following:
- RPi4 board (cortex-72 quad-core 1.5Ghz processor) 4GB/8GB RAM model
- Ubuntu 20.04.2 arm64 image installed on a Samsung EVO+ 128GB micro sd card (any 4GB+ class 10 u3/v30 sdcard will do).
- (Optional) An external USB-based SSD storage with high iops for storage
Flash the image to your microSD card:
$ xzcat ubuntu-20.04.2-preinstalled-server-arm64+raspi.img.xz | sudo dd bs=4M of=/dev/mmcblk0
0+381791 records in
0+381791 records out
3259499520 bytes (3.3 GB, 3.0 GiB) copied, 131.749 s, 24.7 MB/s
Eject and insert the microSD card again to initiate volume mounts, then create an empty /boot/ssh file to enable headless ssh:
# find the mount point
mount -l | grep /dev/mmcblk0
# cd to the writable mount point, for example:
cd /media/rohit/writable
# create an empty ssh file
sudo touch boot/ssh
Next, check and ensure that 64-bit mode is enabled:
cd /media/rohit/system-boot

# Edit config.txt to have this:
[all]
arm_64bit=1
device_tree_address=0x03000000
dtoverlay=vc4-fkms-v3d
enable_gic=1

# Save file and unmount to safely eject the microSD card
sync
sudo umount /dev/mmcblk0p1
sudo umount /dev/mmcblk0p2
Next, eject and insert the microSD card in your Raspberry Pi4 and power on. Find the device via your router dhcp clients list and ssh into it using username ubuntu and password ubuntu.
ssh ubuntu@<ip>
Allow the root user for ssh access using password, fix /etc/ssh/sshd_config and set PermitRootLogin yes and restart ssh using systemctl restart ssh. Change and remember the root password:
passwd root
Next, install basic packages and setup time as the root user:
apt-get update
apt-get install ntpdate openssh-server sudo vim htop tar iotop
ntpdate time.nist.gov # update time
hostnamectl set-hostname cloudstack-mgmt
Ensure that KVM is available at /dev/kvm or by running kvm-ok:
# apt install cpu-checker

# kvm-ok
INFO: /dev/kvm exists
KVM acceleration can be used
Disable automatic upgrades and unnecessary packages:
apt-get remove --purge unattended-upgrades snapd cloud-init
# Edit the files at /etc/apt/apt.conf.d/* with following
APT::Periodic::Update-Package-Lists "0";
APT::Periodic::Unattended-Upgrade "1";
Tip: In case you suspect IO load, to reduce load on RaspberryPi4 micrSD card change the fs commit duration, for example in /etc/fstab: (however this adds risk of potential data loss)
LABEL=writable  /        ext4   defaults,commit=60      0 0
LABEL=system-boot       /boot/firmware  vfat    defaults        0       1
Network Setup
Next, setup host networking using Linux bridges that can handle CloudStack’s public, guest, management and storage traffic. For simplicity, a single bridge cloudbr0 to be used for all traffic types on the same physical network. Install bridge utilities:
apt-get install bridge-utils
Note: This part assumes that you’re in a 192.168.1.0/24 home network which is a typical RFC1918 private network.
Admins can now use netplan to configure networking with Ubuntu 20.04. The default installation creates a file at /etc/netplan/50-cloud-init.yaml which you can comment, and create a file at /etc/netplan/01-netcfg.yaml applying your network specific changes:
 network:
   version: 2
   renderer: networkd
   ethernets:
     eth0:
       dhcp4: false
       dhcp6: false
       optional: true
   bridges:
     cloudbr0:
       addresses: [192.168.1.10/24]
       gateway4: 192.168.1.1
       nameservers:
         addresses: [8.8.8.8]
       interfaces: [eth0]
       dhcp4: false
       dhcp6: false
       parameters:
         stp: false
         forward-delay: 0
Tip: If you want to use VXLAN based traffic isolation, make sure to increase the MTU setting of the physical nics by 50 bytes (because VXLAN header size is 50 bytes). For example:
  ethernets:
    enp2s0:
      match:
        macaddress: 00:01:2e:4f:f7:d0
      mtu: 1550
      dhcp4: false
      dhcp6: false
    enp3s0:
      mtu: 1550
Save the file and apply network config, finally reboot:
netplan generate
netplan apply
reboot
Management Server Setup
Install MySQL server: (run as root)
apt-get install mysql-server
Make a note of the MySQL server’s root user password. Configure InnoDB settings in /etc/mysql/mysql.conf.d/mysqld.cnf:
[mysqld]

server_id = 1
sql-mode="STRICT_TRANS_TABLES,NO_ENGINE_SUBSTITUTION,ERROR_FOR_DIVISION_BY_ZERO,NO_ZERO_DATE,NO_ZERO_IN_DATE,NO_ENGINE_SUBSTITUTION"
innodb_rollback_on_timeout=1
innodb_lock_wait_timeout=600
max_connections=1000
log-bin=mysql-bin
binlog-format = 'ROW'

default-authentication-plugin=mysql_native_password
Restart database:
systemctl restart mysql
Installing management server may give dependency errors, so download and manually install few packages as follows:
apt-get install python2
wget http://mirrors.kernel.org/ubuntu/pool/universe/m/mysql-connector-python/python-mysql.connector_2.1.6-1_all.deb
dpkg -i python-mysql.connector_2.1.6-1_all.deb

# Install management server
echo deb [trusted=yes] https://download.cloudstack.org/rpi4/4.16 / > /etc/apt/sources.list.d/cloudstack.list
sudo apt-key adv --keyserver keyserver.ubuntu.com --recv-keys 484248210EE3D884
apt-get update
apt-get install cloudstack-management cloudstack-usage

# Stop the automatic start after install
systemctl stop cloudstack-management cloudstack-usage
Setup database:
cloudstack-setup-databases cloud:cloud@localhost --deploy-as=root: -i 192.168.1.10
Storage Setup
In my setup, I’m using an external USB SSD for storage. I plug in the USB SSD storage, with the partition formatted as ext4, here’s the /etc/fstab:
LABEL=writable  /        ext4   defaults        0 0
LABEL=system-boot       /boot/firmware  vfat    defaults        0       1
UUID="91175b3a-ee2c-47a7-a1e5-f4528e127523" /export ext4 defaults 0 0
Then mount the storage as:
mkdir -p /export
mount -a
Install NFS server:
apt-get install nfs-kernel-server quota
Create exports:
echo "/export  *(rw,async,no_root_squash,no_subtree_check)" > /etc/exports
mkdir -p /export/primary /export/secondary
exportfs -a
Configure and restart the NFS server:
sed -i -e 's/^RPCMOUNTDOPTS="--manage-gids"$/RPCMOUNTDOPTS="-p 892 --manage-gids"/g' /etc/default/nfs-kernel-server
sed -i -e 's/^STATDOPTS=$/STATDOPTS="--port 662 --outgoing-port 2020"/g' /etc/default/nfs-common
echo "NEED_STATD=yes" >> /etc/default/nfs-common
sed -i -e 's/^RPCRQUOTADOPTS=$/RPCRQUOTADOPTS="-p 875"/g' /etc/default/quota
service nfs-kernel-server restart
Seed systemvm template from the management server:
wget https://download.cloudstack.org/rpi4/systemvmtemplate/4.16/systemvmtemplate-4.16.0-kvm-arm64.qcow2
/usr/share/cloudstack-common/scripts/storage/secondary/cloud-install-sys-tmplt \
          -m /export/secondary -f systemvmtemplate-4.16.0-kvm-arm64.qcow2 -h kvm \
          -o localhost -r cloud -d cloud
KVM Host Setup
Install KVM and CloudStack agent, configure libvirt:
echo deb [trusted=yes] https://download.cloudstack.org/rpi4/4.16 / > /etc/apt/sources.list.d/cloudstack.list
sudo apt-key adv --keyserver keyserver.ubuntu.com --recv-keys 484248210EE3D884
apt-get update
apt-get install qemu-kvm cloudstack-agent
systemctl stop cloudstack-agent
Enable VNC for console proxy:
sed -i -e 's/\#vnc_listen.*$/vnc_listen = "0.0.0.0"/g' /etc/libvirt/qemu.conf
Fix security driver issue:
echo 'security_driver = "none"' >> /etc/libvirt/qemu.conf
Enable libvirtd in listen mode:
sed -i -e 's/.*libvirtd_opts.*/libvirtd_opts="-l"/' /etc/default/libvirtd
Configure default libvirtd config:
echo 'listen_tls=0' >> /etc/libvirt/libvirtd.conf
echo 'listen_tcp=1' >> /etc/libvirt/libvirtd.conf
echo 'tcp_port = "16509"' >> /etc/libvirt/libvirtd.conf
echo 'mdns_adv = 0' >> /etc/libvirt/libvirtd.conf
echo 'auth_tcp = "none"' >> /etc/libvirt/libvirtd.conf
The traditional socket/listen based configuration may not be supported, we can get the old behaviour as follows:
systemctl mask libvirtd.socket libvirtd-ro.socket libvirtd-admin.socket libvirtd-tls.socket libvirtd-tcp.socket
systemctl restart libvirtd
Ensure the following options in the /etc/cloudstack/agent/agent.properties:
guest.cpu.arch=aarch64
guest.cpu.mode=host-passthrough
host.reserved.mem.mb=640
Configure Firewall
Configure firewall:
# configure iptables
NETWORK=192.168.1.0/24
iptables -A INPUT -s $NETWORK -m state --state NEW -p udp --dport 111 -j ACCEPT
iptables -A INPUT -s $NETWORK -m state --state NEW -p tcp --dport 111 -j ACCEPT
iptables -A INPUT -s $NETWORK -m state --state NEW -p tcp --dport 2049 -j ACCEPT
iptables -A INPUT -s $NETWORK -m state --state NEW -p tcp --dport 32803 -j ACCEPT
iptables -A INPUT -s $NETWORK -m state --state NEW -p udp --dport 32769 -j ACCEPT
iptables -A INPUT -s $NETWORK -m state --state NEW -p tcp --dport 892 -j ACCEPT
iptables -A INPUT -s $NETWORK -m state --state NEW -p tcp --dport 875 -j ACCEPT
iptables -A INPUT -s $NETWORK -m state --state NEW -p tcp --dport 662 -j ACCEPT
iptables -A INPUT -s $NETWORK -m state --state NEW -p tcp --dport 8250 -j ACCEPT
iptables -A INPUT -s $NETWORK -m state --state NEW -p tcp --dport 8080 -j ACCEPT
iptables -A INPUT -s $NETWORK -m state --state NEW -p tcp --dport 9090 -j ACCEPT
iptables -A INPUT -s $NETWORK -m state --state NEW -p tcp --dport 16514 -j ACCEPT

apt-get install iptables-persistent

# Disable apparmour on libvirtd
ln -s /etc/apparmor.d/usr.sbin.libvirtd /etc/apparmor.d/disable/
ln -s /etc/apparmor.d/usr.lib.libvirt.virt-aa-helper /etc/apparmor.d/disable/
apparmor_parser -R /etc/apparmor.d/usr.sbin.libvirtd
apparmor_parser -R /etc/apparmor.d/usr.lib.libvirt.virt-aa-helper
Launch Cloud
Start your cloud:
cloudstack-setup-management
systemctl status cloudstack-management
tail -f /var/log/cloudstack/management/management-server.log
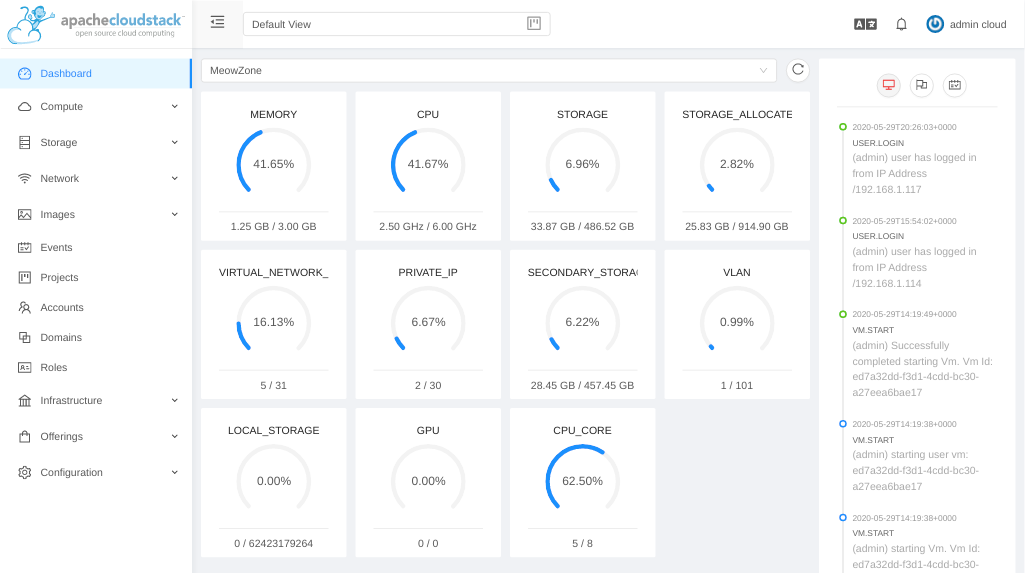
After management server is UP, proceed to http://192.168.1.10:8080/client/primate (change the IP suitably) and log in using the default credentials – username admin and password password.

NOTE: I found some DB issue while deploying a zone, please check/run the following until the bug is fixed upstream, using MySQL client:
use cloud;
ALTER TABLE nics MODIFY COLUMN update_time timestamp NULL;
Example Setup
The following is an example of how you can set up an advanced zone in the 192.168.1.0/24 network.
Setup Zone
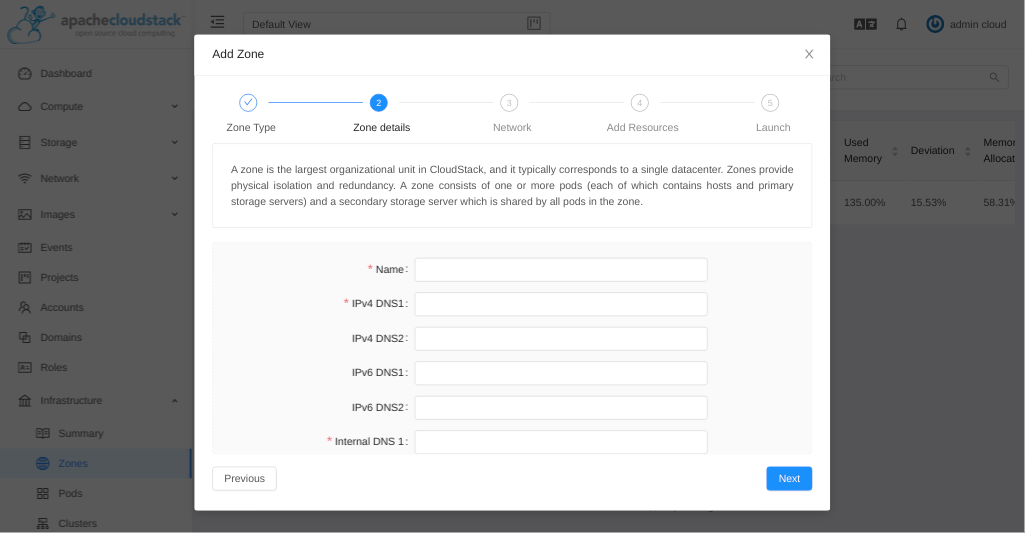
Go to Infrastructure > Zone and click on add zone button, select advanced zone and provide the following configuration:
Name - any name
Public DNS 1 - 8.8.8.8
Internal DNS1 - 192.168.1.1
Hypervisor - KVM
Setup Network
Use the default, which is VLAN isolation method on a single physical nic (on the host) that will carry all traffic types (management, public, guest etc).
Note: If you’ve iproute2 installed and host’s physical NIC MTUs configured, you can use VXLAN as well.
Public traffic configuration:
Gateway - 192.168.1.1
Netmask - 255.255.255.0
VLAN/VNI - (leave blank for vlan://untagged or in case of VXLAN use vxlan://untagged)
Start IP - 192.168.1.20
End IP - 192.168.1.50
Pod Configuration:
Name - any name
Gateway - 192.168.1.1
Start/end reserved system IPs - 192.168.1.51 - 192.168.1.80
Guest traffic:
VLAN/VNI range: 500-800
Add Resources
Create a cluster with the following:
Name - any name
Hypervisor - Choose KVM
Add your default/first host:
Hostname - 192.168.1.10
Username - root
Password - <password for root user, please enable root user ssh-access by password on the KVM host>
Note: root user ssh-access is disabled by default, please enable it.
Add primary storage:
Name - any name
Scope - zone-wide
Protocol - NFS
Server - 192.168.1.10
Path - /export/primary
Add secondary storage:
Provider - NFS
Name - any name
Server - 192.168.1.10
Path - /export/secondary
Next, click Launch Zone which will perform the following actions:
Create Zone
Create Physical networks:
  - Add various traffic types to the physical network
  - Update and enable the physical network
  - Configure, enable and update various network provider and elements such as the virtual network element
Create Pod
Configure public traffic
Configure guest traffic (vlan range for physical network)
Create Cluster
Add host
Create primary storage (also mounts it on the KVM host)
Create secondary storage
Complete zone creation
Finally, confirm and enable the zone. Wait for the system VMs to come up, then you can proceed with your IaaS usage.
You can build your own arm64 guest templates or deploy VMs using these guest templates at: https://download.cloudstack.org/rpi4/templates
About the Author
 Rohit Yadav is a Principal Engineer at ShapeBlue. He has been involved with Cloudstack since 2012 when he was first made a committer in the Apache CloudStack project and has made more code commits to Cloudstack than any other developer in its history. He has been a PMC member of the project since 2015. Rohit is the author & maintainer of the Cloudstack CloudMonkey project and has been instrumental in the development of many of CloudStack’s flagship features.
Rohit spends most of his time designing and implementing features in Apache CloudStack. In his free time, he has a passion for renewable energy technology and is always willing to help people passionate about open-source technologies.
Read more articles from Rohit on his personal blog.
Rohit Yadav oversees the Software Engineering function at ShapeBlue, providing leadership and mentorship to our ever-growing Engineering Team. He has been a PMC member of the project since 2015. Rohit is the author & maintainer of the CloudStack CloudMonkey project and has been instrumental in the development of many of CloudStack’s flagship features. Rohit regularly speaks at events, focussing on developer access to the project, and has also mentored Google Summer of Code students.